A foodie's quest to turn up the heat through strength and conditioning with whole food and a hungry mind.

Showing posts with label healthy dessert. Show all posts

Tuesday, March 27, 2012

Chobani Greek Yogurt: Review and Free Giveaway Contest


Look what I got in the mail; Chobani Greek Yogurt!! Ok, so I actually got these about 2 weeks ago, but who’s keeping track? Don’t answer that….

I already had 2 of these....
The happy and friendly people at Chobani graciously sent me these large containers of Plain, Non-Fat Chobani to sample and review.  I requested plain as I like to control the sugar added to yogurt, and you can use it in sweet or savory applications. Or, as Kelly and I like to do, just eat it right out of the container. At only 140 calories for a cup of the plain, non-fat, you could eat half of a 32 oz container for a mere 280 protein packed calories. Sweeten with NuNaturals Vanilla Liquid stevia for an easy dessert!

Chobani has quickly become the leading Greek yogurt brand across America and is the official sponsor and provider for the U.S. Olympic Team through 2014. Of course, I’ve already been enjoying their yogurt before this news since it is affordable and offers the thick, creamy consistency I love.

Many yogurt brands claim their yogurt is “Greek” by adding thickeners and other artificial ingredients to obtain the look and consistency, but Chobani only uses what’s needed for real Greek yogurt. Here’s a quote directly from their FAQ section:

“You won’t find any thickeners, gelatins or stabilizers in Chobani. Instead we use a centuries-old straining technique to remove excess liquid. This is why Chobani is so thick, creamy and packed with two times more protein than regular yogurts.”

With their quality products, Chobani provides quality customer service since they know the consumer (us) are the backbone to a successful company. I have experienced their excellent service several times, and I am never let down by their response. Go ahead; contact Chobani just to say hi or offer praise, someone will happily respond within no time.

Since I have had Chobani before, I already knew about its superior taste and consistency (just a little tangy, very thick, and super creamy), so I decided to cook with what I received. Here are several recipes/ideas (new and old) I created using what Chobani sent me.


Sweet or Savory Chobani Protein Corn Bread


Ingredients
3/4 cup applesauce or pumpkin puree
1/2 cup Chobani plain non-fat Greek yogurt
1 large egg and 4 large egg whites (I have used 12oz of pureed Mori-Nu Silken Tofu for a great vegetarian substitute)
1 cup whole grain spelt (or other whole grain) flour
1 cup whole grain corn flour
1/4 cup all-natural stevia sweetened vanilla soy or whey protein
1/2 cup all-natural unflavored soy or whey protein
1/2 teaspoon salt
1 teaspoon baking soda
12-oz can Zevia Ginger Ale (Sweet) or 12-oz bottle of favorite beer (Savory)*

 
*Since I obviously had enough yogurt, I made both versions.  I Added a tsp of cinnamon to the sweet bread mixture; for savory bread, I used all unflavored protein powder and added cumin, garlic powder, cayenne, and paprika.

Directions
-Preheat the oven to 350 degrees. Spray a 13 x 9-inch baking pan or a 12 muffin baking pan with non-stick spray
-In a large bowl, beat eggs with a whisk, add all other wet ingredients and whisk to blend
-In another bowl, mix the flour, protein powder, salt, and baking soda together.
-Add dry ingredients to the liquid mixture and mix just until combined.
-Pour the batter into prepared pan. Bake for 35 to 40 minutes or when a toothpick comes out clean.

Other use - The savory batter is also great in casseroles either combined with other ingredients or poured on top after everything else is placed in your baking dish.

Icing that's ok to lick off the top!!

Chobani Greek Yogurt Icing

 With 2 cups plain, non-fat Chobani Greek Yogurt, add one of the following ingredients for desired flavor:
- 1/2 cup peanut flour for peanut butter icing
- 1/2 cup vanilla protein powder (preferably stevia sweetened) and 1/4 tsp pure vanilla extract
- 1/2 cup chocolate protein powder (preferably stevia sweetened) and 6 drops NuNaturals Cocoa Bean Extract
- 1 very ripe mashed banana and 1/4 tsp vanilla extract
- 1/2 cup pumpkin puree, 1 tsp cinnamon, 1/2 tsp ginger and nutmeg, and 1/4 tsp cloves
This is so good you’ll want to eat the icing as is, and since it’s healthy, you can have your cake icing and eat it too.......guilt-free!

Sweet n’Spicy Chip Dip

Take 6 oz low fat cottage cheese (pureed if you don’t want chunks), ¼ cup plain non-fat Chobani Greek yogurt, ¼ cup salsa, 1 teaspoon cayenne pepper, 1 tablespoon honey, 1 tablespoon horseradish (optional), 2 tablespoons chopped parsley, Salt and pepper to taste. Combine all ingredients in a bowl and mix well. Let chill for 1-2 hours to let flavors meld.

Serve with sliced fruit and veggies for dipping or spread on toast for a quick, portable snack. I like to make a sandwich with this spread and sliced apples for something different but very satisfying.

Low-cal Guacamole
Take prepared guac (homemade or storebought) and add a small jar of salsa and mix thoroughly. The salsa will add to the amount of dip you have and provide more for everyone to enjoy. This way you can serve more if you have company, or just eat more yourself; it will be a big hit either way!


Use Chobani for this easy Peanut Butter Dip N’Dots recipe I posted last week. Does my mixing container look familiar?


For more great recipes and ideas, check out Chobani’s Kitchen website for healthy dinners and desserts.
Are you ready to cook with Chobani Greek Yogurt or just want to grab a spoon and eat it right out of the container? Kelley loves the plain non-fat with Annies Chocolate Bunny Grahams used for dipping, and I usually steal a few bunnies for myself.....delish!

Chobani has been kind enough to offer a sample case of their number one Greek yogurt in the U.S. to one lucky reader of my blog.

Disclaimer: Although Chobani provided the yogurt for review, I was not compensated for this review and the views and opinions are all my own.

Sorry, this contest has ended.  Thank you for stopping by and please visit often; there will be more giveaways coming soon!

 
1. Comment telling me your favorite Chobani flavor or which one you’d like to try.

2. Follow me on Twitter and Tweet the following – “I’m entering to win @Chobani Greek yogurt from @I_Love_Cayenne! Enter for your chance to win - http://bit.ly/Hbrk2U"
3. Visit Chobani on Facebook and “LIKE” their page. If you already “Like” Chobani, leave a comment letting me know.
4. “LIKE” Just Add Cayenne of Facebook. If you already “Like” Just Add Cayenne, leave a comment letting me know.
5. Help support Just Add Cayenne and subscribe to my blog. Just post a comment if you are already subscribed.

Congratulations, Irina, you won the Chobani Giveaway!  Please contact me via e-mail to provide contact information to where you would like your yogurt shipped.

If I do not receive a response withing 2 days, I will randomly pick another contestant to win.
Everyone is a winner when they request coupons directly from Chobani by submitting your info here, don't wait, do it and you'll be happy you did!

I love contests that are easy to enter, and I’m more than delighted to offer such a great product to one lucky viewer. Good luck!

Wednesday, August 24, 2011

3 Easy and Healthy Dessert Recipes

Are you constantly looking for a way to remake recipes to be healthier without sacrificing flavor? If so, you are not alone; this is a continuous uphill battle for me, but its part of the fun of cooking! Trial and error is also one of the best ways to learn, and when it’s in the kitchen, you can still have tasty, edible errors.


The hardest recipes to give a makeover are baking recipes as science plays a major role in the end product. I have accepted this and deal with my dense, less flavorful creations with grace by still using them and trying again next time. My biggest issue is replacing the volume of sugar called for since I use liquid stevia which only takes several drops for the same sweetness equivalent. I will tend to use less flour with pumpkin puree, mashed banana, plain yogurt, or applesauce as a replacement. Also, there are a lot of egg whites and protein powder involved. Regardless, I’m happy with most of the results, but they need work if I were to ever ask anyone else to try.
I was ecstatic when I stumbled onto this healthy dessert blog where the blogger shares her tasty but healthy recipes; most of them remakes of old favorites. Although there are numerous recipes to try and savor, I found 3 that you should give a try today.


“Blondie Batter” Dip

• 1 1/2 cups chickpeas (1 can, drained) (250g)
• heaping 1/8 tsp salt
• tiny bit over 1/8 tsp baking soda
• 2 tsp vanilla extract
• 1/4 cup nut butter (or even a combination of applesauce and oil, and then use less milk)
• 1/4 cup plus 3T nondairy milk (or more or less, as needed) (Use less if omitting flax)
• Sweetener (see note below, for amount)
• 1/3 cup chocolate chips
• Optional: I add 1/4 cup flaxmeal for omega 3s and a fun texture (you can also add quick oats!)

Add all ingredients (except for chocolate chips) to a blender or food processor, and blend until very smooth. Then mix in the chocolate chips.
Sweetener Notes: I used 2/3 cup brown sugar when I made this for the party. I’ve also used stevia before. And liquid sweeteners (agave, maple, etc.) are fine as well.


Carrot Cake Milkshake

• 1 extremely-ripe, large banana (frozen)
• 2/3 cup non-dairy milk (For an extremely rich, “ice cream”-like shake, try coconut milk. Also, use more or less, depending on desired thickness.)
• If, like me, you prefer smoothies in a bowl, reduce milk, or add a pinch of xantham and guar gums.
• 1 tsp pure vanilla extract
• heaping 1/2 tsp cinnamon
• 1 small carrot (50g or so)
• scant 1/16 tsp salt (to bring out sweetness)
• Optional: coconut oil or homemade coconut butter.
Steam your carrot first, then blend all of the ingredients together in your blender, food processor, or even a Magic Bullet. (Note: This still tastes delicious if you just use almond milk. But it’s more of a carrot cake smoothie than a true milkshake.)

Fudge Munchkins
(makes 14-18 brownie bites)

• 1/4 cup unsweetened cocoa powder
• 1/2 cup ww pastry flour (or white, or you can try spelt)
• 1/4 tsp baking powder
• 1/4 tsp salt
• 1/2 cup sweetener (see link, below, for lower-sugar version)
• 1.5 oz mori-nu firm (or lite firm) tofu (about 1/8 box)
• 1/3 cup applesauce (use only 1/4 cup if using 3T oil)
• 1 to 3 T oil (I use coconut oil. Canola is ok too.)
• 2 T non-dairy milk
• 1 tsp pure vanilla extract
Combine dry ingredients, and mix very well. In a blender, combine wet ingredients and blend until smooth. (I use a Magic Bullet cup.) Pour wet over dry and stir, then pour into a 4×6 oiled pan (or double the recipe and use an 8×8) for regular brownies, or mini muffin tins for brownie bites. Cook for 12-18 minutes at 325F. I’m not sure why this is the case, but these brownies seem to taste ten times sweeter if you don’t eat them for at least an hour after they come out of the oven!

Click for lower-sugar version, as well as Calorie Information.
Notes: If you’re expecting these brownies to taste like brownies from a boxed mix, you’ll need to use dutch cocoa processed with alkali as your cocoa powder. Also, you can use agave or maple syrup as your sweetener. Reduce applesauce to 1/4 cup, but be aware that your brownies will be a bit denser.

Fudge Daddies

My personal favorite: If you want extreme fudgey brownies—as in “so gooey you need a fork to eat them”—cook the batter in a 4×6 pan (or double the recipe and use an 8×8) for only 10 minutes. Then put the pan in the fridge to cool for at least a few hours.

I plan on trying other recipes very soon (like these PB Cookies), but these really stand out for me. In places where she calls for flour, I will replace up to half of the amount with a natural and stevia sweetened vanilla whey protein powder. Also, I tend to use less oil than usually called for and a puree of some sort as I mentioned above. Although these recipes are pretty healthy, I look for ways to omit all sugar and only have stevia for sweetener; using mashed bananas help to add a natural sweetness too.
The Blondie Batter Dip and Carrot Cake Milkshake are great to make while it’s still hot outside. Another plus to me, is that the healthfulness of these recipes make it possible to eat as part of breakfast, lunch, or dinner! Give one or all of these recipes a try and let me know how you like them and if you changed anything.

Friday, July 29, 2011

6 Non-Traditional Grain-Free Cereal Options


Do you love cereal but get tired of pouring the same box of crunchy grains every day?
I can eat cereal almost any time of day; it’s my ultimate comfort food. I use a medium-sized plastic cup to eat cereal mixed with frozen fruit, nuts, yogurt, squash puree, and milk. Yes, sometimes all of that is in just one cup!

There are times when I just don’t feel like dumping something from a box for my cereal cravings, so I opt for a non-traditional “cereal” approach. Think of whole foods that are crunchy and tasty; then chop them into bite-sized pieces to use as a “cereal” component.
Here are a few of my favorite options:
Organic Apples

With apples being one of the most pesticide-infected produce items, I always get organic. To make as a great cereal substitute, just core, slice, and chop an apple into small cubes about the size of pistachio kernels. I like to toss in a few roasted almonds, pistachios, or peanuts and mix with plain, non-fat yogurt for an awesome grain-free “cereal.” If you’re craving something sweet, use half fat free vanilla yogurt in place of half of the plain stuff. Adding honey or, my favorite, vanilla liquid stevia to the mix is another great suggestion. I will cut several apples into cereal size and keep them in the freezer as a quick go-to treat for morning, noon, or night.
Organic Sweet Potatoes

As another heavily sprayed produce item, I stick with organic potatoes too. Rinse and scrub a potato (I leave the peel on, but you can peel if you must), and then microwave for about 4 minutes turning half-way through, or cut into small cubes and boil until slightly soft. This is not crunchy, but makes for a great change in texture and is really good when mixed with cinnamon, yogurt, almonds, and a little milk with honey. I usually microwave the potato and then cut into cubes; boiling seems to be more of a hassle and some nutrients will be lost in the water.

Bananas

Take a peeled banana and chop into bite-sized cubes just like the apple above; either use right away for a softer cereal treat, or freeze the pieces for a firmer texture. Freezing is my favorite way to go since I enjoy the firm texture and the built in “chill effect” of my cereal. Dry roasted peanuts, cinnamon, yogurt, and milk are my go-to choices, but do what sounds good to you.

Winter Squash

Butternut or Delicata are the better options for a natural sweetness, but I have used Acorn squash with good results too. To make these into a grain-free cereal choice, peel the skin (I leave it on sometimes), cut in half, scoop out the seeds, and proceed to chop into the desired cubes suitable for eating as a cereal. Toss the cubes with a little cinnamon, nutmeg, ginger, or nothing and roast in a pre-heated oven at 375 degrees for 40-50 minutes; stir 2 times while cooking. Let these cool and store in an air-tight container in your fridge to use when you choose. Add your favorite roasted or raw nuts for more taste and texture along with yogurt and/or milk. Enjoy!

Carrots

Since they are naturally crunchy, and almost top the list in sugar content for veggies, carrots are a great choice for a grain cereal alternative. Peel and chop like the other produce items mentioned, then use as you desire. These will store easily in an airtight container or bag in the fridge. I find peanuts pair well with the carrots, and tossing in some natural raisins can really make for an exciting treat.

Jicama

Known as the Mexican potato, jicama does not have an intense flavor on its own, but it is very refreshing and another great choice for a refreshing crunch. Peel the jicama (instructions on this link) and chop into cubes accordingly. I use half light coconut milk in a can with half water and some yogurt as the coconut flavor is great with this veggie. Add in some unsweetened shredded coconut for more flavor and try mixing with some banana or apple and almonds too.
Other selections I have used but find they are better when mixed with choices above are blueberries and papaya. Blueberries are easy; I buy these frozen and just add the amount I want at any time. I will buy fresh papaya, peel, then chop into small cubes and place in the freezer to use as I please. Papaya, as I blogged about in a past post, is a great addition to any of these mixes for its digestive enzyme content and excellent tropical taste.

I have tried and continue to use all of these cereal alternatives just to keep things varied in my diet, but my favorite choice are the chopped and frozen apples. Think of other produce you like that could be used as a non-grain cereal and give it a try; the freezer will help make softer things crunchy and double as a way for long term storage and use. I use plain, non-fat Greek yogurt with a little milk to keep from being too thick in most of these applications, and roasted peanuts, almonds, or pistachios really help with extra crunch and nutrition.

Try one, all, or your own versions and let me know how you liked it compared to the traditional stuff in a box. One more thing, I don’t have any of my own yet, but this might be a great (sneaky) way to treat your kids and have them eat their fruits and veggies too!

Friday, July 22, 2011

Make Your Own Sugar-Free Pudding with Stevia

Are you a fan of pudding? Do you like it warm, cold, or both depending on the type? I usually enjoy a cool, creamy pudding made from scratch, but am guilty of using the instant mixes or premade versions in the past. Since store bought puddings have sugar listed as the first ingredient (mixes and premade), you know there’s a lot of it! Trying to limit my sugar intake, I would buy the sugar-free varieties loaded with artificial sweeteners, hydrogenated oils, artificial colors, and unpronounceable words (never a good sign for ingredients). After noticing bad cramps and pains right after the sugar-free stuff, I decided it was best to make my own as I saw fit; just like almost everything else food related.

There are different ways to make your own pudding; some can be labor intensive using eggs and a stovetop while others are pretty quick and easy. What I like about making my own pudding is, obviously, you control what goes into it. As I’ve said before, I don’t really follow a recipe, just use it as a starting point and change where I so desire. Sometimes the changes work out, and sometimes not so much, either way, you learn something.
Seeing as to how I am against using sugar in most things, and the artificial stuff doesn’t sit well with me (plus it’s artificial), I use stevia in recipes calling for sugar. It takes a few trial and error attempts, but there is always a takeaway after each attempt. I use the liquid stevia in all of my cooking venture, if you want to use the stevia granules, here’s a useful conversion chart found at this site.

Below are some of my favorite pudding recipes using stevia. By far, brown rice pudding is my favorite…..although the chocolate is not far behind!

Sugar-Free Vanilla Rice Pudding with Stevia

Servings: 4
2 cups cooked whole grain brown rice
1 1/2 cups skim milk; I use unsweetened almond milk, try whatever milk you like best
1 tablespoon liquid vanilla stevia
1 ripe mashed banana
1 teaspoon ground cinnamon/1 teaspoon nutmeg /1 teaspoon allspice – optional
Dash of sea salt

- In medium saucepan, combine rice, milk, liquid stevia, & bring to boil.
- Reduce heat & simmer 20 minutes, stirring frequently.
- Remove from heat, stir in mashed banana, dash of salt, and any spices you are using.
- Serve warm or store in fridge with a layer of plastic wrap covering the top to prevent skin forming.
Feel free to experiment with your own add-ins as desired to make it yours. I enjoy this as a cold pudding, but many people enjoy having their rice pudding warm. A common addition is raisins, so feel free to toss some in, but I do not like to add raisins to pudding as it takes away from the consistent creaminess. Many recipes call for butter, but I found using the mashed banana adds flavor and gives the same effect as butter would in this dish.
My other favorite recipe is pure and simple; chocolate or vanilla pudding is another comfort food you can never grow tired of. The recipe below does not require many ingredients which makes for a simple creation in your complex world.

Sugar-Free Vanilla (or Chocolate) Pudding with Stevia
3/4 tsp liquid vanilla stevia or 1/2 tsp stevia granules*
3 tbsp arrowroot (cornstarch can be used too)
1/4 tsp salt
2 1/4 cups milk; I use unsweetened almond milk, but skim, rice, or lite coconut milk will work too
1 1/2 tsp. vanilla.
*Add 1/4 cup unsweetened cocoa powder and use liquid chocolate stevia if making chocolate pudding
Add milk, stevia, and salt to a medium saucepan; cook over medium heat, stirring constantly, until mixture boils. Mix cornstarch with 1/4 cup water and pour into saucepan; bring to a boil and stir constantly; it will start the thicken. Remove from heat and let cool 5 minutes; stir in vanilla. Put contents in airtight container and place plastic wrap on top to prevent a skin forming. 

Try using lite coconut milk and sprinkle unsweetened coconut on top after you're done for a tropical treat.  When making vanilla pudding, I love adding crushed ginger snaps on top for a nice crunch and a little bite.
I have made this too runny before, so it might take a few tries. If yours becomes too watery, try using more arrowroot or cornstarch next time. Don’t throw the runny pudding away! Pour it in individual paper cups and place in freezer; tear away the cups after several hours for tasty pudding popsicles.  I haven't tried it yet, but added 1/2 cup of peanut flour will be my next stevia pudding creation....can't wait!!
Cooking with stevia can be challenging, but the benefits outweigh any challenges. Besides just offering a natural zero calorie sweetness, stevia has these benefits:

- It's good for your digestive system, curbing candidiasis
- It inhibits the growth of all sorts of bacteria
- It helps with an upset stomach, soothing acidity
- It increases energy levels and promotes an overall feeling of well-being.

Don’t let thinking about conversions stop you from making awesome, stevia sweetened treats. I use a handy conversion chart when cooking with stevia to help avoid stress from confusion; you might find it useful too.


Stevia Conversion Chart

Granulated Sugar........Stevia Granules
1 teaspoon..............1/8 teaspoon
1 tablespoon............3/8 teaspoon
1/4 cup.................1 1/2 teaspoons
1/2 cup.................1 tablespoon
1 cup...................2 tablespoons


Granulated Sugar........Clear Liquid Extract
1 teaspoon..............4-6 drops
1 tablespoon............8-12 drops
1/4 cup.................1/8 tsp
1/2 cup.................1 Tbsp
1 cup...................2 Tbsp


Now get in the kitchen and treat yourself to a cool (or warm) and creamy natural sugar-free pudding tonight!

Wednesday, April 27, 2011

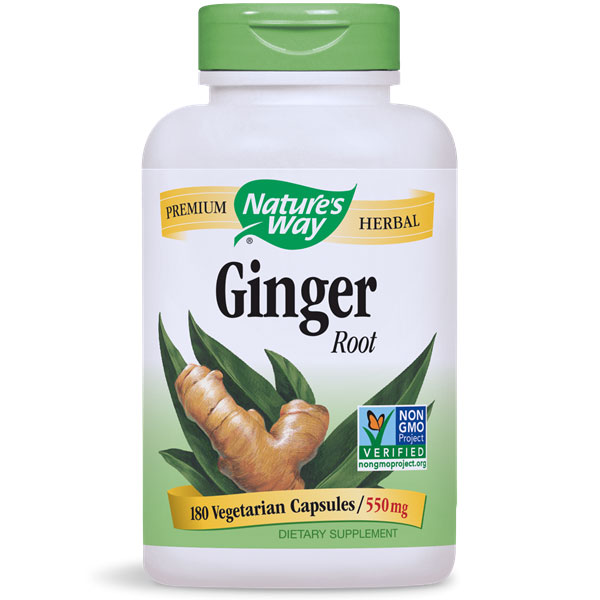
Feel Nice With Ginger's Spice

I’m a big believer in using food as my medicine as often as possible. Ginger is a food that many use for its relieving properties and spicy taste when added to other food or drink. Daily consumption of ginger in some form may help protect and relieve you from common problems amongst the general population.


Here are ten facts about ginger and its properties that will hopefully encourage you to try it for the first time or keep using it.

1. It can be used to calm an upset stomach, providing relief of bloating and gas.
2. Helps stimulate the secretion of mucus which helps in quieting a cough and soothing scratchiness in your throat.
3. Calms feelings of nausea, particularly in the form of seasickness, morning sickness, motion sickness and as a side effect of chemotherapy.
4. Ginger contains anti-viral, anti toxic, and anti fungal properties. This makes it useful for the prevention of and treatment against the common cold.
5. Acts as an antihistamine to ward off allergies.
6. Has anti inflammatory properties which help to treat arthritis and other muscular disorders. The chemical components of the root are helpful in inhibiting the biosynthesis of prostaglandins which are responsible for causing inflammation.
7. Contains special enzymes responsible for breaking down the proteins in your food, thus aiding in digestion and the prevention of cramps. The ancient Greeks used to eat ginger after a large meal in order to ease the digestion process.
8. Due to its promotion of mucus secretion, ginger protects against the development of ulcers.
9. Ginger has proven to help lower your cholesterol levels and prevent the formation of blood clots.
10. It is frequently used to treat and ease symptoms of diarrhea.

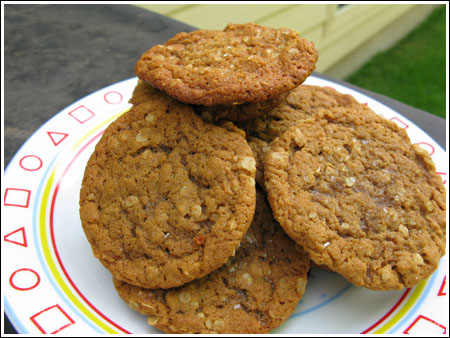
Ginger’s pungent, spicy taste comes from its volatile oils which play a major role in many of its benefits. These oils help to stimulate digestive enzymes that assist with the body’s digestion and neutralize unwanted acids. You can find ginger in many forms. It is in many beverages and dried teas; it’s also found preserved, pickled, candied, crystallized, fresh, dried, and pill form. Of course, there are the ginger cookies which I prefer the most!

Here are a couple of recipes using ginger that I enjoy:

Ingredients

- 1 ½ C Rolled oats
- 1 ½ C Whole wheat flour
- 2 tsp Grated fresh ginger or ginger powder
- 1 teaspoon baking soda
- 3/4 teaspoon ground cinnamon
- 1/2 teaspoon ground cloves
- 1/2 tsp Sea Salt
- 1 tsp Liquid Stevia and 3/4 C applesauce or canned pumpkin puree
- 1 Egg
- 1 Egg white
- 1/4 C molasses (use honey if you don’t have molasses)
- 1 tsp Vanilla extract

1. Preheat oven to 350 degrees F (175 degrees C). Sift together the oats, flour, ginger, baking soda, cinnamon, cloves, and salt. Set aside.
2. In a large bowl, mix the applesauce or pumpkin and Stevia until combined. Beat in the egg and egg white, and stir in the molasses. Gradually stir the sifted ingredients into the molasses mixture. Shape dough into walnut sized balls. Place the cookies 2 inches apart onto a parchment paper lined cookie sheet, and flatten slightly with a floured fork.
3. Bake for 8 to 10 minutes. Allow cookies to cool on sheet for 5 minutes before removing to a wire rack to cool completely.

These are great anytime of day, but my favorite thing is to dip them in fresh black coffee. Don’t knock it until you try it……the taste is so comforting.

Try adding fresh chopped ginger (you can use powder if you don’t have fresh) to stir-fries with chicken, garlic, and cubed sweet potatoes. Cook with coconut milk for a real flavor explosion! Check out this recipe for mashed sweet potatoes with garlic, ginger, and coconut milk.

Some more quick ideas to add ginger to your diet are:


•Many teas include ginger in their mix, and I like to have a cup almost every night to help with digestion as I sleep.
•Stir a bit of dried powdered ginger or grated fresh ginger in to hot breakfast cereal, such as oatmeal or cream of wheat or rice.

•Add ginger powder to homemade granola.
•Chop crystallized ginger and add to cakes, pies, cookies, muffins, cupcakes, and even shortbread.
•Stir ginger into sauces, including applesauce, cranberry sauce, jams, jellies and spreads.
•Make a fresh sparkling ginger drink by grating fresh ginger, stir in a teaspoon of raw honey, pour in sparking water, and add a squeeze of fresh lime or lemon juice.
•Add ginger to just about any marinade or rub it directly onto steak, chicken or chops before cooking.

Of course, you can always cut a piece of fresh ginger to nibble on for fast relief if needed. I urge you to use ginger more often, your body will thank you!

More info on ginger can be found here.

Wednesday, April 6, 2011

Go Greek!

With Greek yogurt, that is. Maybe you have already joined the Greek yogurt fan club, or maybe you are still eating the regular kind, or mayyybbeee just the thought of yogurt makes you sick. Whatever the case, any yogurt, Greek or regular, carries many benefits for the body. But, a side to side comparison goes to show the Greek variety to tout the “better for you” badge.

Just looking at the two types will illustrate the thicker and creamier consistency of Greek yogurt. The extra body is a result of an extra straining process to remove whey and water; no unnecessary thickeners are needed which is a big plus. The downside to the extra straining is that there is less calcium in Greek versus regular yogurt. So, if you depend on yogurt for your primary calcium source, you might want to stick with the regular stuff or start taking a supplement.

Less calcium is the only negative result from extra straining. With the water and liquid whey being strained, Greek yogurt provides more protein and healthy bacteria than regular because there’s more of the good stuff by volume. The bacteria aids in the break-down of lactose (milk sugar), making it easier to digest for lactose intolerant individuals. Additional straining also removes more sodium and sugar in Greek yogurt, reducing the carb and sodium amounts in half when compared to regular varieties. This makes Greek strained yogurt a superior choice for people with heart conditions or high blood pressure.
In sum, Greek yogurt offers the following when weighed against the regular stuff:

- Almost twice the protein
- Only half the carbohydrates (sugar)
- Creamier and thicker
- Only half the sodium
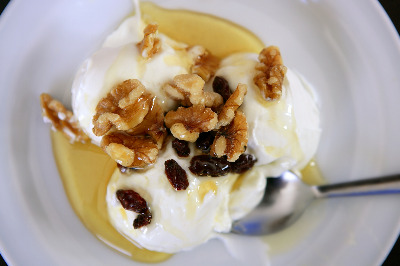
Whether it’s Greek or regular, I sugguest buying plain, non-fat versions and adding your own flavor as you see fit.  This helps avoid the crazy amounts of sugar added by the manufacturer. The thick, smooth and tangy profile of Greek yogurt is usually good enough for me, but a drizzle of honey, fresh or frozen fruit, and a few chopped nuts makes for a real treat.


A few brands that stand out among the rest are Stonyfield Farms, Chobani, and Fage. My top choice is usually Chobani as it offers the same quality and nutrition as the others, but usually costs less. Also, I have a dealt with the company on an issue that they were quick to resolve. It really shows how they value their customers.

Check out this link for your chance at winning a whole case of Chobani Greek Yogurt!
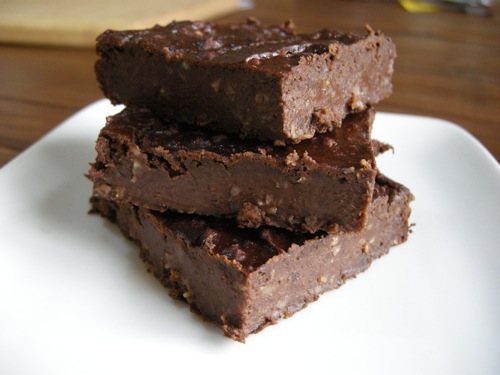
Aside from just eating as is, yogurt is a great substitute in many cooking and baking recipes too. Greek yogurt, though, can be heated without curdling which makes for an easier use in high temperature cooking. Greek yogurt can be used in many of your favorite dip recipes. Just add a packet of ranch dip to a container of plain Greek yogurt for an instant, flavor-filled dip for pita chips or veggies. It’s also great as a marinade as the acids in yogurt help to tenderize meat.

Stonyfield Farms offers useful ideas and a printable substitution guide that can be found here.
Here’s an excellent Tzatziki recipe from Chobani’s website I love to make and use as a dip or marinade, and the longer it sits in the fridge, the more flavorful it becomes.

Ingredients
  • 1 medium cucumber, peeled, seeded, shredded, and squeezed dry in a kitchen towel
  • 2 C (16oz) Plain 0% Chobani Greek Yogurt
  • 2 tsp fresh lemon juice
  • 1/4 tsp salt
  • 2 garlic cloves, minced
  • 1 Tbsp extra virgin olive oil
  • 1 Tbsp red wine vinegar
  • 1 Tbsp fresh or 1 tsp dried oregano
Preparation

Mix all ingredients together in bowl. Cover and refrigerate 1 hour or overnight.
Nutrition Information (per Tbsp): Calories 13, Fat 0g, Saturated Fat 0g, Trans Fat 0g, Cholesterol 0mg, Sodium 25mg, Carbohydrate 1g, Fiber 0g, Sugars 1g, Protein 2g

I use Greek yogurt as a substitute in many baking recipes that call for oil, and still end up with an outstanding treat that’s low in fat but high in flavor and protein. It also replaces other fatty ingredients like heavy cream, cream cheese, sour cream, ricotta cheese, and even butter.

A great banana bread recipe using Greek yogurt is a tried and true way to satisfy cravings for a guilt-free snack, breakfast, or anytime of day.  Spread some peanut butter on a thick slice for a real treat.

Ingredients
  • ¾ cup all-purpose flour
  • ¾ cup whole-wheat flour
  • 1 tsp baking soda
  • ½ tsp salt
  • 2 Tbsp butter
  • ½ cup natural applesauce (no sugar added)
  • ¾ cup sugar - I use about 1 1/2 tsp of liquid stevia
  • 2 large eggs - or 4 egg whites
  • 1 tsp vanilla extract
  • 3 large overripe bananas
  • ½ cup Chobani Plain 0% Greek Yogurt
  • ½ cup walnuts, toasted and chopped (optional)
  • ½ cup semi-sweet chocolate chips (optional)
Preparation

Grease large loaf pan. Preheat oven to 350F. In a small bowl, stir together flours, baking soda, and salt.
Peel bananas. Cut each in half lengthwise and then cut each half into halves. Chop quartered bananas into 2-inch pieces. Set aside.
In a large bowl, cream butter and sugar into a smooth paste. Add applesauce and vanilla, and mix until combined. Add eggs on at a time, and beat until incorporated.
Add flour mixture to wet ingredients, and mix well. Add chopped bananas, nuts and/or chocolate chips and Chobani.
Fold ingredients in, being careful not to break up banana chunks. Bake at 350˚F for 1 hour or until inserted knife comes out clean when removed from loaf.

Nutrition Information: Calories 210, Fat 4g, Sat Fat 2g, Protein 6g, Carbohydrate 40g, Fiber 3g, Sodium 110mg

For more flavorful Greek yogurt recipes, check out Chobani’s website.
Whether you eat it alone, with fruit and honey, mixed in cereal, as a substitute in baked goods, a marinade, a dip, or base for a smoothie, you are sure to be please with the end result. So give it a try and go Greek if for only one day……I guarantee you’ll be left wanting more!

Monday, April 4, 2011

If Batman were a bean....


....he'd be a Black Bean!  Not just because of the obvious, "Dark Knight," nickname he has, but they are both symbols of strength packed with many extras.  Maybe you are already aware of the many benefits derived from these tasty turtle beans, or you just enjoy eating them.  Either way, incorporating black (and other whole) beans is a smart choice for a long, healthy life.

Black beans are an excellent source of molybdenum, a mineral that aids in the detoxification of sulfites. Sulfites are preservatives found in foods like deli meat and canned goods. Persons who are sensitive to sulfites in these foods may experience rapid heartbeat, headache or disorientation if sulfites are unwittingly consumed.


Black beans are also rich in dietary fiber, which contributes to their cholesterol-lowering benefits and low glycemic index rating. Soluble fiber absorbs water in the stomach forming a gel that slows down the metabolism of the bean's carbohydrates. The presence of fiber is also the primary factor in the cholesterol-lowering power of beans and their aid in preventing heart disease.

The Journal of Agriculture and Food Chemistry found that the darker a bean's seed coat, the higher its level of antioxidants. As such, black beans are found to have the most antioxidants, followed in descending order by red, brown, yellow, and white beans.
Black Bean on FoodistaBlack Bean
Vegetarians use black beans to replace red meat as a source of high quality protein. When combined with whole grains like barley, whole wheat pasta, or brown rice, they provide protein comparable meat or dairy without the high calories or saturated fat often found in these foods.

Black beans' contribution to cardiovascular health also lies in their significant amounts of folate, magnesium, and poylphenols. It has been estimated that consumption of 100% of the daily value (1 cup of black beans offer 64%) of folate would, by itself, reduce the number of heart attacks suffered by Americans each year by 10%.

Black beans contain iron and manganese which are essential to the production of energy in our bodies. These nutrients also aid the body in warding off unwelcome outside intruders.

Read more on black beans' benefts at http://www.whfoods.com/.
 
If their excellent flavor wasn't reason enough, the numerous benefits should help motivate you to let black beans find a place on your plate.  I love to get canned beans and use as a quick salad topper or mix in with store bought salsa for protein in a flash.  Be cautious with the canned variety, check ingredients to ensure only black beans are in the can, and be sure to drain and rinse to remove the high levels of sodium.
 
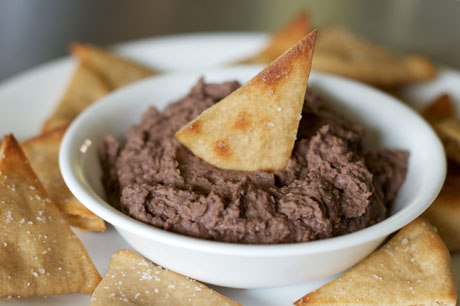
Instead of refried pinto beans, use fat free refried black beans that are usually found canned right next to the pinto beans.  Even better, just buy canned black beans in their whole form and mash them with a fork for your own "refried" beans.  These make a great dip, spread, or base to mix with plain yogurt, salsa, and any herbs/spices you like to wow your family!  One of my favorite, Kelley's too, recipes is a one-pot meal with quinoa, canned tomatoes or salsa, and black beans mixed together with cilantro, cumin, and, of course, cayenne for a quick, tasty, healthy lunch or dinner.  This would even go great in a tortilla for a perfect vegetarian wrap.
 
Have a sweet tooth but don't want the guilt afterward?  Try black bean brownies!  You will get extra protein, fiber, and nutrients when you replace flour with black beans.  Try the following recipe as a starter, and don't be scared to change ingredients as you see fit.


Ingredients


1 (15.5 ounce) can black beans, rinsed and drained

3 eggs - or use 5 egg whites - or use 2 mashed bananas for vegan brownies

3 tablespoons vegetable oil - applesauce or mashed bananas can be used to replace half of this amount

1/4 cup unsweetened cocoa powder

1 pinch salt

1 teaspoon vanilla extract

3/4 cup white sugar - use 1/3 cup agave nectar or honey - or use 1 to 2 tsp liquid stevia

1/4 cup milk or dark chocolate chips (optional)


Directions


1.Preheat oven to 350 degrees F (175 degrees C). Lightly grease an 8x8 square baking dish.

2.Combine all ingredients except chocolate chips in a blender and blend until smooth; pour mixture into the prepared baking dish. Sprinkle the chocolate chips over the top of the mixture if using. If your mixture seems too messy or fudgy, try adding 1/4 cup of oats to your mix.

3.Bake in the preheated oven until the top is dry and the edges start to pull away from the sides of the pan, about 30 minutes
 
Don't wait too long to make these awesome brownies, you'll find no one will even notice they are packed with black bean protein and fiber.  I wish you all good eats!!